Upgrades4MGs
Get more from your B... Engine Upgrades
Tuning the SU carbs
Ok, this section is more about the upgrades than trying to help you set the carbs. there are plenty of good websites that detail setting up twin carbs. For example, here's one such guide.
I would seriously recommend a couple of specific tools for the setting of carbs - either buy or borrow depending on how much use to which you think you might them. However, they are invaluable for idiots like me! I used to watch my father fiddling with a tube as a stethoscope and a little twiddle here and a little twiddle there and the car ran like a dream afterwards! Unfortunately I wasn't blessed with the same skills!
That said, the best thing is to get them balanced first then work on them in equal amounts until you're satisfied that all is well! That is assuming that all is well elsewhere within the engine - that valve stem clearances are set correctly, plugs are gapped correctly and the points set and the distributor timed correctly. As Iain Cameron always points out, it is worth doing a compression check on your cylinders to ensure that there is undue wear on one of the cylinders.
So what are these tools?
The first tool is the Gunsons Carbalancer which is probably less than £15 in Halfords.
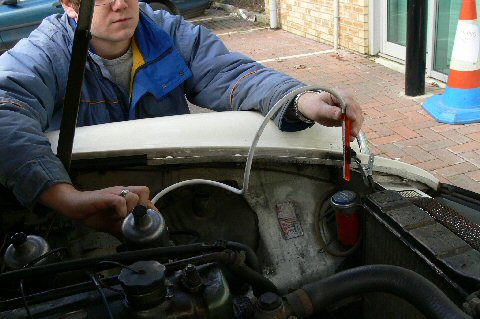
You'll need to remove the air filters to allow the Carbalancer to be used.

However, once the linkages are disconnected, it's very simple to set the balance and to later go back and check the balance periodically as you work on the mixture.
The second very useful tool, all in my opinion, of course, as some will disagree, is the Gunsons Gastester. This is a useful tool for checking the CO levels (especially prior to an MOT) but the fact is, the B does seem to produce very high CO readings at idles so the gauge is more an indication of correct mixture, and if you attempt to achieve the 3.5% recommended in the guide and in the MGB Handbook, it will tend to be a bit lean at revs.
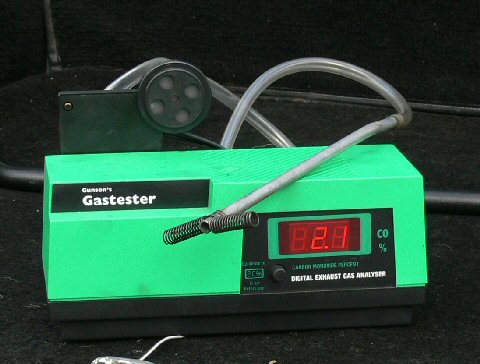
However, for the MOT, a figure of 3.5% is a good target whilst for after the MOT, a figure of 4.5% is more likely. Once you have let the machine calibrate in fresh air to around 2.0% you simply insert the probe into the exhaust and start fiddling. The power is supplied from the car's battery and it has a usefully long lead. I usually position it on the ground to the left of the car where I can see it from the front. So far the unit has proved a useful buy (2nd hand off Ebay - used once).
So, now you are all set to start fiddling and making some serious improvements!
Filters
This is the first, and probably the most satisfying area for upgrades. Mainly because it looks "well 'ard" once you have fitted your air filters!
However, the very topic causes much disagreement among owners! The main purpose of the upgrade is to allow more air to be drawn into the engine, and the standard paper element air filter is considered too restrictive. The likes of the K&N filters are designed to allow better airflow whilst improving on the filtration. Another benefit is that the filter can be cleaned and re-used, so over the life of the vehicle, the unit will probably pay for itself (unless you don't do much mileage).
The first thing you need to decide is whether you are doing this for looks, for fast road use or for track day action.
If it is for looks then buy some nice shiny pancake filters.
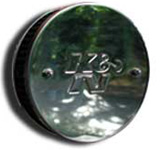
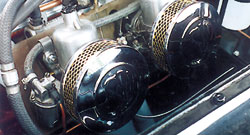
These photos from the MGOC Spares website.
Try and avoid the foam type inserts for filtering as unless they are regularly oiled, they are generally not as effective at filtering as a standard air filter element. The problem with the narrower profile units is that the air has to make a restrictive sharp turn into the the mouth of the carb, and so the use of sub-stacks are recommended.
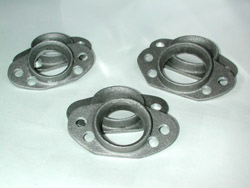
There are cheaper options such as Speedograph, but generally these do more in the way of increasing induction noise than much else. But as I said, if it's just looks, then it's a low cost Bling exercise!
NB: The photo above reminds me that whenever refitting carbs and air filters, always make sure you get the gaskets lined up properly as it is all too easy to block off the balance holes resulting in poor running.
If you are going for fast road use, then you need to consider deeper elements. The reason for the depth on the original Cooper boxes is, according to several tuning experts, to allow the air an easier passage into the carburettor. In reality the original Cooper Cans were spot-on. In their favour, the Cooper Cans tend to draw from two points rather than from all around, thus avoiding the hotter air coming off the exhaust manifold. Iain Cameron has fitted the K&N elements directly inside his Cooper Cans.
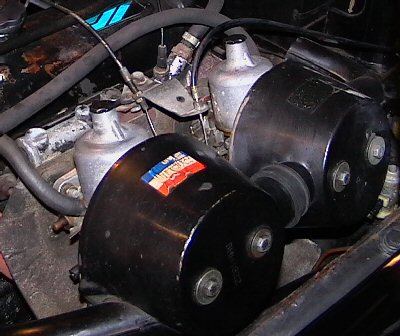
The Cooper Cans are also easy enough to refit, especially on the HIF carbs with the threaded bases.
The base plates of the cans are solid cast and nicely radius-ed for smooth airflow, and need to be used with the K&N filters. Most suppliers sell the K&N elements as a set with a back plate as seen below:

The problem is that although this looks good, it is a very difficult job to fit the filter elements - in fact it is a right pain that usually means much cursing, especially on the HS carbs which have a horseshoe at the back for the support bolts!
One simple modification would be to use wing nuts, and with the support bolts first secured to the carbs, then you simply fit the gasket, base plate, element and back plate in simple and easy steps.
Alternatively, you do what Stuart Longstaff has done:
"The
K&N purchased are part number 56-9095. These are round bolt on filters for
individual carbs and appear to be larger than the normally fitted K&N that
come with the "MG" logo. They have a mounting hole which is offset to
the bottom.......see K&N's web site for spec - http://www.knfilters.com/search/product.aspx?Prod=56-9095
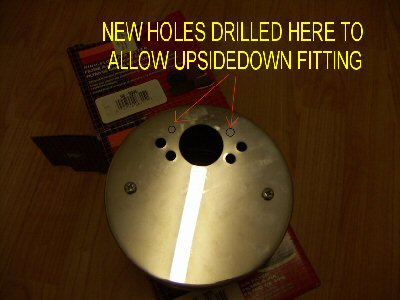
They
were advertised as fitting MGB which they would, but only if you don't want to
close your bonnet.
Fortunately
I'd the B has plenty of clearance below so all that was required were a couple
of extra holes in each filter to allow fitting upside-down (my father in law has
suggested I've got N&K's fitted or K&N's for the Aussy market).
As
I'd purchased some K&N stub stacks, I was able to use them as a template for
the new holes. Also as luck would have it, the old holes don't need blocking as
the filter/carb gasket covers this nicely.
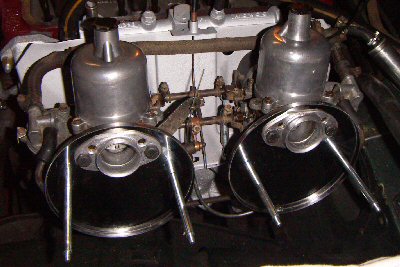
I'm very happy with the looks but won't be able to say if any increase power due to the other fitted mods at the same time (the PB head has a new dissy)"
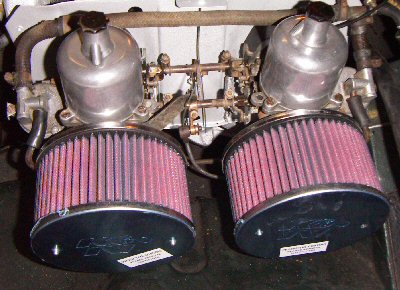
Stuart's method above requires the use of the Sub-stack as as he mentioned since there is insufficient space to re-use the original base plate.
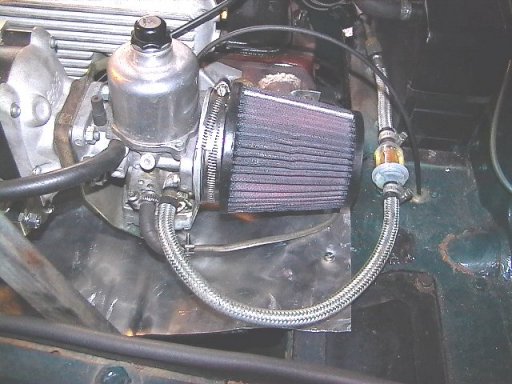
However, another approach to the problem is to secure the base plate to the carb body using shallow headed or recessed bolts, and then fitting the filter to the base with a large jubilee clip - the photo below is Phil Earl's supercharger fitted with this arrangement, albeit on a single carb.
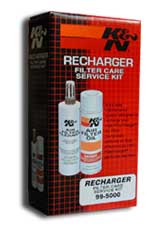
No matter which way you decide to approach this, remember that the filters will need an occasional clean using the appropriate kit, followed by a re-oiling.
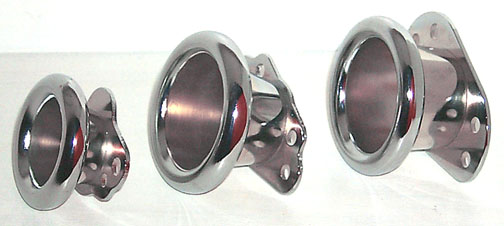
For ultimate track action, then the usual approach is to throw away the filter to eliminate any restriction to the air flow. However this will result in a higher/faster wear rate as the very fine, invisible particulate is sucked into the engine. At the very least, a trumpet or ram pipe should be used with a stocking over the inlet.
http://www.knfilters.co.uk/ image below
With that objective achieved by upgrading the filters, the next step is the mixture. Once again, there are mixed opinions on whether this is necessary. Certainly, the mixture will need re-setting, but another school of opinion is the need to change the needles, too. The needles are carefully profiled in such a way that the mixture can be controlled quite precisely across the rev range. I think it was Peter Burgess that states in his book that there are more fuelling points on an SU than in a fuel injection system. However, the carbs are quite sensitive to having the right needle as Bryn and I found out one evening messing with his carbs trying different needles. A skilled tuning expert can probably profile the needles to suit individual engines.
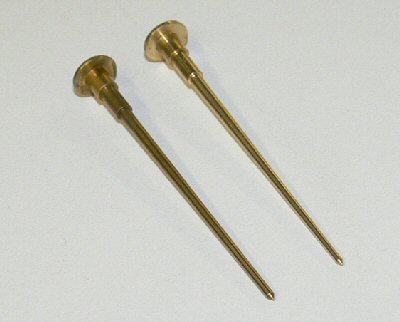
However, for my part, I prefer to go with the guidance given by Moss and others that for a Stage 2 head with K&N filters, then a set of AAA needles is about right for both HS and HIF. In the photo above you can see the slimmer profile of the AAA needle at the top against the standard needles fitted in the HIF carbs.
To swap the needles, you will need to remove the dash pots and the will mean undoing the three screws holding the pots down to lift out the pistons. Take care when removing the dash pots, there is a big spring underneath, not a powerful one but nevertheless it is there.
It's quite possible that the piston and dash pots will be quite dirty and possibly sticky from years of use. Under no circumstances should you attempt to clean this with any form of abrasive. Take a bit of carb cleaner (or even some petrol) and rub it in to remove the deposits. The piston should slide smoothly inside the dash pot. If it does not, then it needs more cleaning. Also, try and avoid mixing the parts. The piston will take a wear in its dashpot and its best to keep it that way.
Removing the needles for is fairly straight forward, it's usually a screw on the side of the piston. Many of the pistons will have self-centring needles, but earlier HS pistons may need the needle centring (good luck!).

The needle will slide out complete with bush and spring once the screw is slackened and as Haynes always say, refitting is the reverse of dismantling.
Avoid damaging the needles or bending them etc while fitting for obvious reasons. One problem of the self centring needles is that they put some pressure on the side of the jet, so be aware that it may be necessary at some point to rebuild the units and replace the jets.
Once refitted to the carbs, then you will need to check the mixtures and idle speeds again.
HIF Improvements
One area where the HIF changed from the HS was the fitment of a wax-stat that was meant to make minor adjustments to the jet so that as the air got warmer, thinner and less dense it would compensate. The wax-stats can give problems later on, especially if the car is stood idling in traffic for long periods, resulting in rough running.
Another change was the fitment of "poppet valves" on the butterfly spindles. This was designed to reduce the amount of fuel settling on the walls of the inlet manifold when the throttles were snapped closed as you took your foot off the pedal. As the throttles opened again, the unburnt fuel would result in poor emissions. To counter this the poppet valves would briefly open as the throttles closed allowing a small amount of air through to prevent fuel condensing.
However, over time, the valves become worn, and can affect the setting up of the carbs, making it difficult to get a decent idle speed. In addition, the valves were quite sizeable and thus caused a major restriction in the air flow through the carb.
Therefore when rebuilding the HIF carbs use throttle plates form the HS carbs. This immediately reduces the restriction, and makes setting the carbs a lot easier as I found. More importantly, the immediate and noticeable benefit I found was that I had much better engine braking when coming off the throttle. If you are not rebuilding your carbs, then it is usually recommended that you solder the valve closed.
Another difference from the earlier cars is the fitment of the vacuum advance on the balance tube of the inlet manifold. I am not sure of the exact reasons for this but the earlier cars had the advance pipe coming off the rear carb just on the throttle spindle. I disconnected the vacuum advance after I read in Peter Burgess' book that the inlet manifold at idle creates too much advance, and this explained the pinking I always got at low speed despite retarding it. It's academic now I have the EDIS, anyway.
HS Improvements
The major one here is the use of dust seals on the spindles to minimise wear as were used on the HIFs.
SU Carb set up
The curse of the B, the most feared part of the engine, the most messed with, and often incorrectly set bit of kit! Remember, though, as the saying goes, 90% of carb faults are electrical!